Manage Course Completion Records
Add Training Records
Options below allow trainers to add records of one-on-one coaching, hands-on evaluations, fit-tests, other training not scheduled beforehand, alternate or external training.
To take attendance for previously scheduled events, see Manage Scheduled Event page instead.
-
Compare Options for Entering Training Records
Choose the best method for entering records based on the criteria in the table below.
Method Recommended if: Trainer: Add Record(s) to Person's History - You have only a few records (<5) to enter
- You want to view/verify the person's course history before or after adding the new completion.
- You want to make sure you are finding the correct person and/or check their track assignments at the same time.
Trainer: Add Record(s) to a Course's History - You have 3-15 records to enter, especially if all trained on same day, in the same subject.
- You need to add a supporting document along with the records (sign-in sheet, site-specific form, etc.) Be sure to use only file names that are short and do not use any periods, commas, or other special characters or your file won't be retrievable.
Trainer: Bulk Import - You have over 25 records to enter, are comfortable with Excel and/or creating a tab-delineated TXT file, and expect to do large groups regularly (you will be self-sufficient after just a couple imports).
- You have an accurate NetID for everyone.
- You are entering group completion records for multiple courses, such as Bloodborne Pathogens and Medical Waste.
- No individual documentation is required, such as site-specific checklists (individual documentation not possible with this option).
Trainer: Manage Scheduled Event - You expect 10 or more participants of your group training
- You want the system to capture the attendees' NetID during enrollment (rather than the trainer having to collect and enter NetIDs)
- You want automated email reminders sent to the enrollees 3 days and 1 day prior to the event; and/or email the enrollees with updates about the event such as cancellations or rescheduling
- You are willing to record attendance after the event, including both Finished and No Shows.
Learner: Upload Form - Training course is either Site-Specific Training or WPS
- The supervisor (or a designated trainer) has provided the training and opportunity for learners to ask questions; and
- Learner is not employed by IPF nor RHS.
- Learner does not work in a lab environment in one or more labs, or your supervisor has advised that you must enter your own site-specific training documentation into Ability.
-
Option: Add Record(s) to a Learner's History
- Select Manager Menu > People.
- Search for person. Click the name.
- Click on the History tab.
- Click on wizard-wand icon. A pop-up window will open.
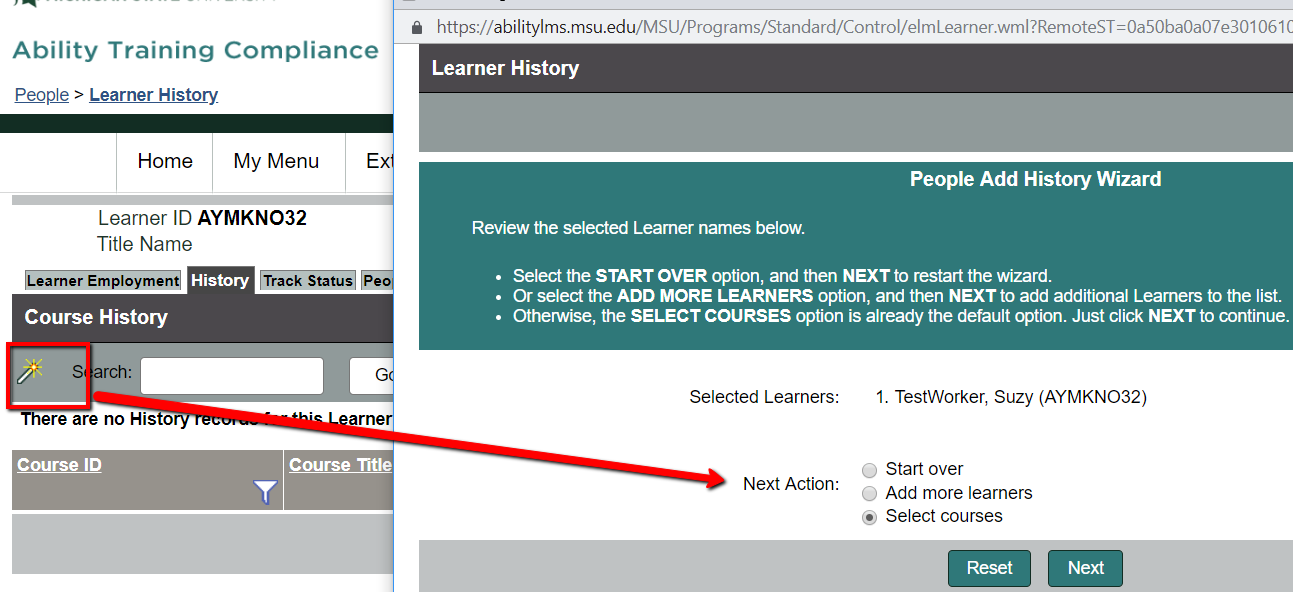
- Enter the course ID or course title or part of the course title to bring up all courses with those terms in title. Click Next.
- In the pop-up window (see screenshot image), enter the date the training was completed, select a trainer (recommended), and upload any documentation (e.g. evaluation form, certificate from other institution, signature form). For supporting documentation, use only file names that are short and do not use any periods, commas, or other special characters. Click next to confirm.
-
Option: Add Record(s) to a Course's History
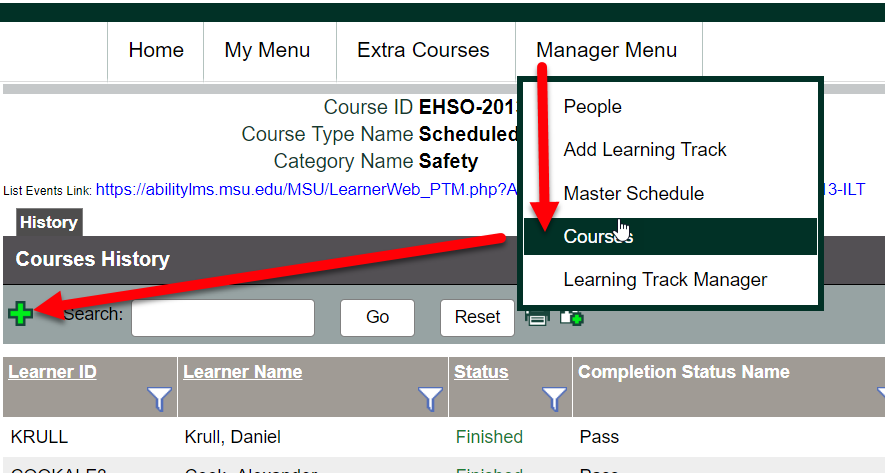
- Select Manager Menu > Courses.
- Search for course by name. Click course title.
- Click on green add + icon. A window will pop up (see animation of the process).
- Click Select learners > Next. Search for all learners by NetID or name (in the left column) and move them to the column on the right. Click Next.
- Complete the records as necessary by editing dates (enter the date once at the top and it cascades down to everyone on the list), adding documentation, trainer names, etc. Click Next.
Notes about this method:- For site-specific training, tractor assessment, and some other subjects, it is recommended to add a Supporting Document in a new tab file with details on the location, subjects covered, trainer. Be sure to use only file names that are short and do not use any periods, commas, or other special characters or your file won't be retrievable.
See also Printable Guide for Entering Hands-On Evaluations.pdf and the Site-Specific Safety Training Documentation Options Guide.PDF -
Enter Alternate Training, Waiver, Exception
For options for handling occasional acceptance of non-MSU training in lieu of an MSU course, see Handling Exceptions to Required Training
View Training Records, Details
Trainers can view all history of completions regardless of whether you taught a particular event and even if you do not have a learner on your People list.
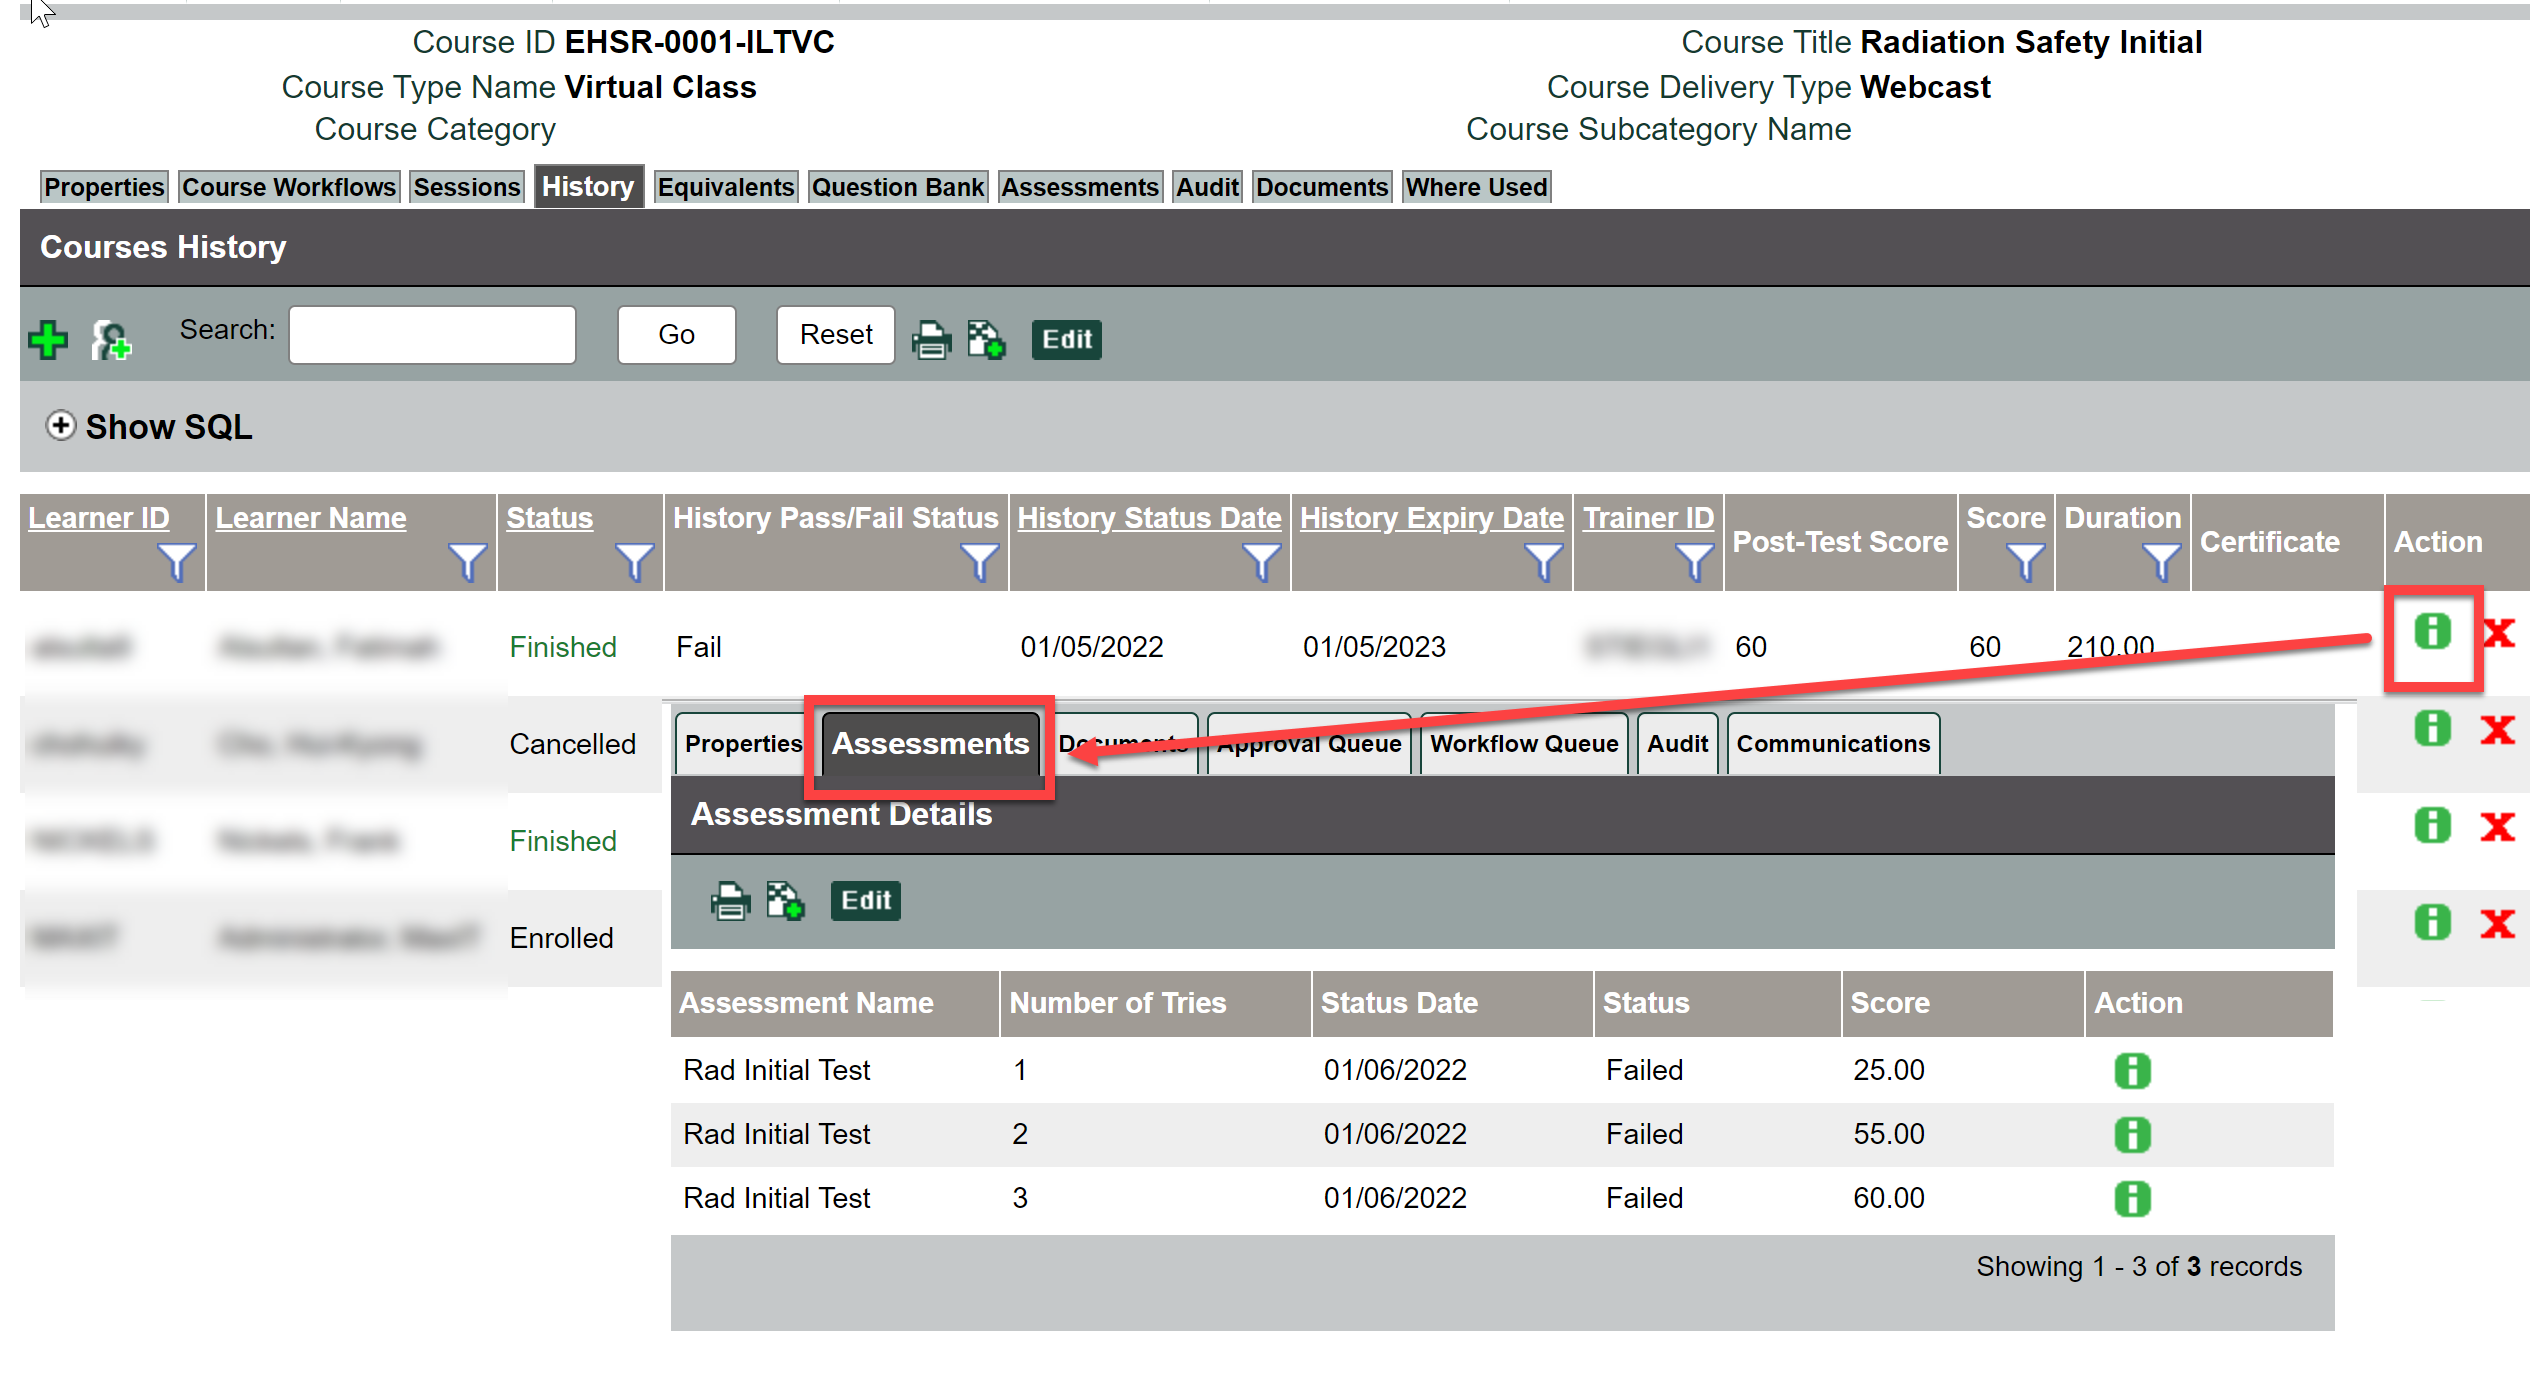
Depending on the course and assessment type, trainers can view additional details such as the time the learner spent on the course, answers to quiz questions, scores of all quiz attempts, etc.
-
Option: View Learner's Records
Click Manager Menu > People > find the learner you seek. By default you will be taken to the learner's Track/Requirement screen. Click the learner's History tab to the left to see course history records.
-
Option: View Course Records
Click Manager Menu > Courses > the specific course history you want to view or edit.
By default, the most recent completions are on top. Enter a learner's name or netID to search. Remember, a learner can complete a course multiple times.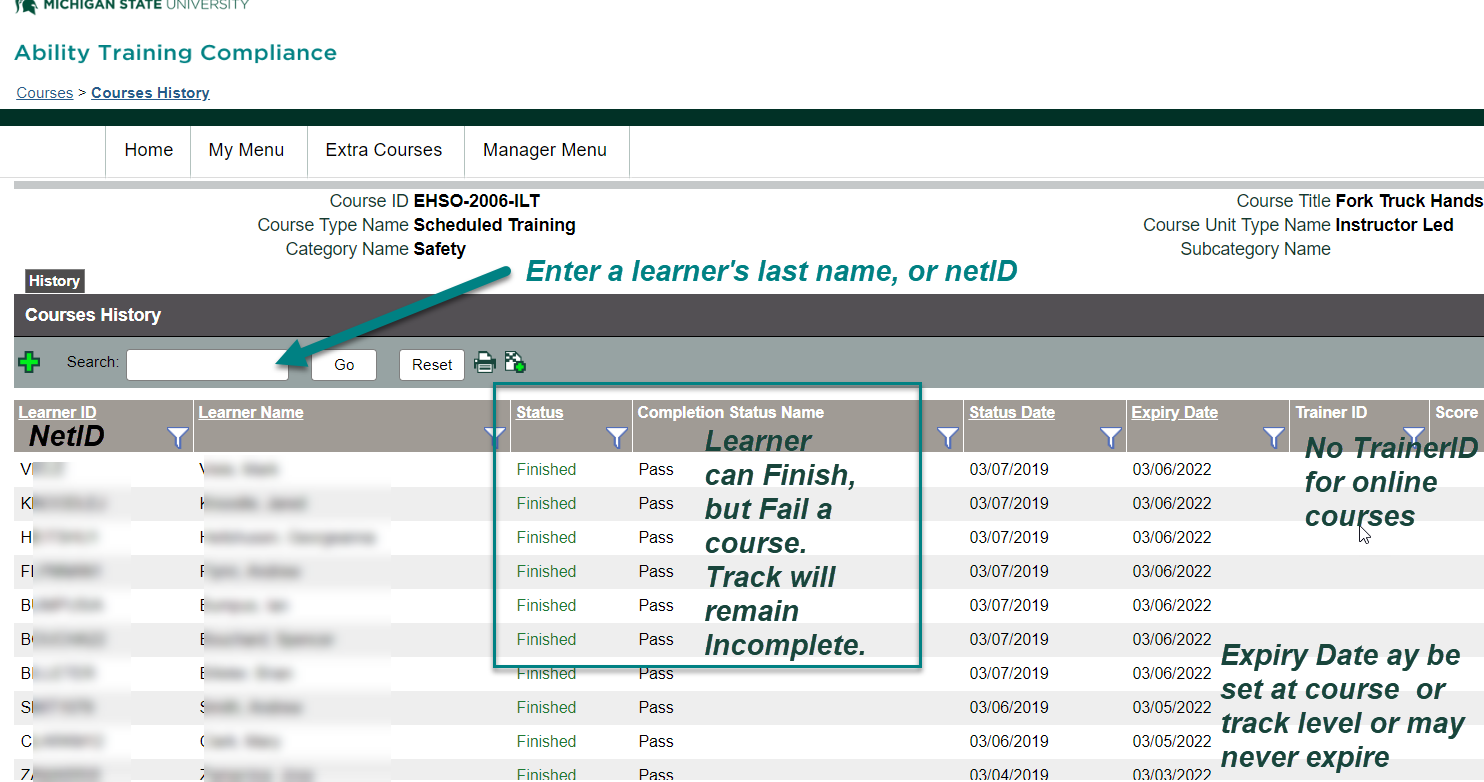
-
View Ability Assessment Details
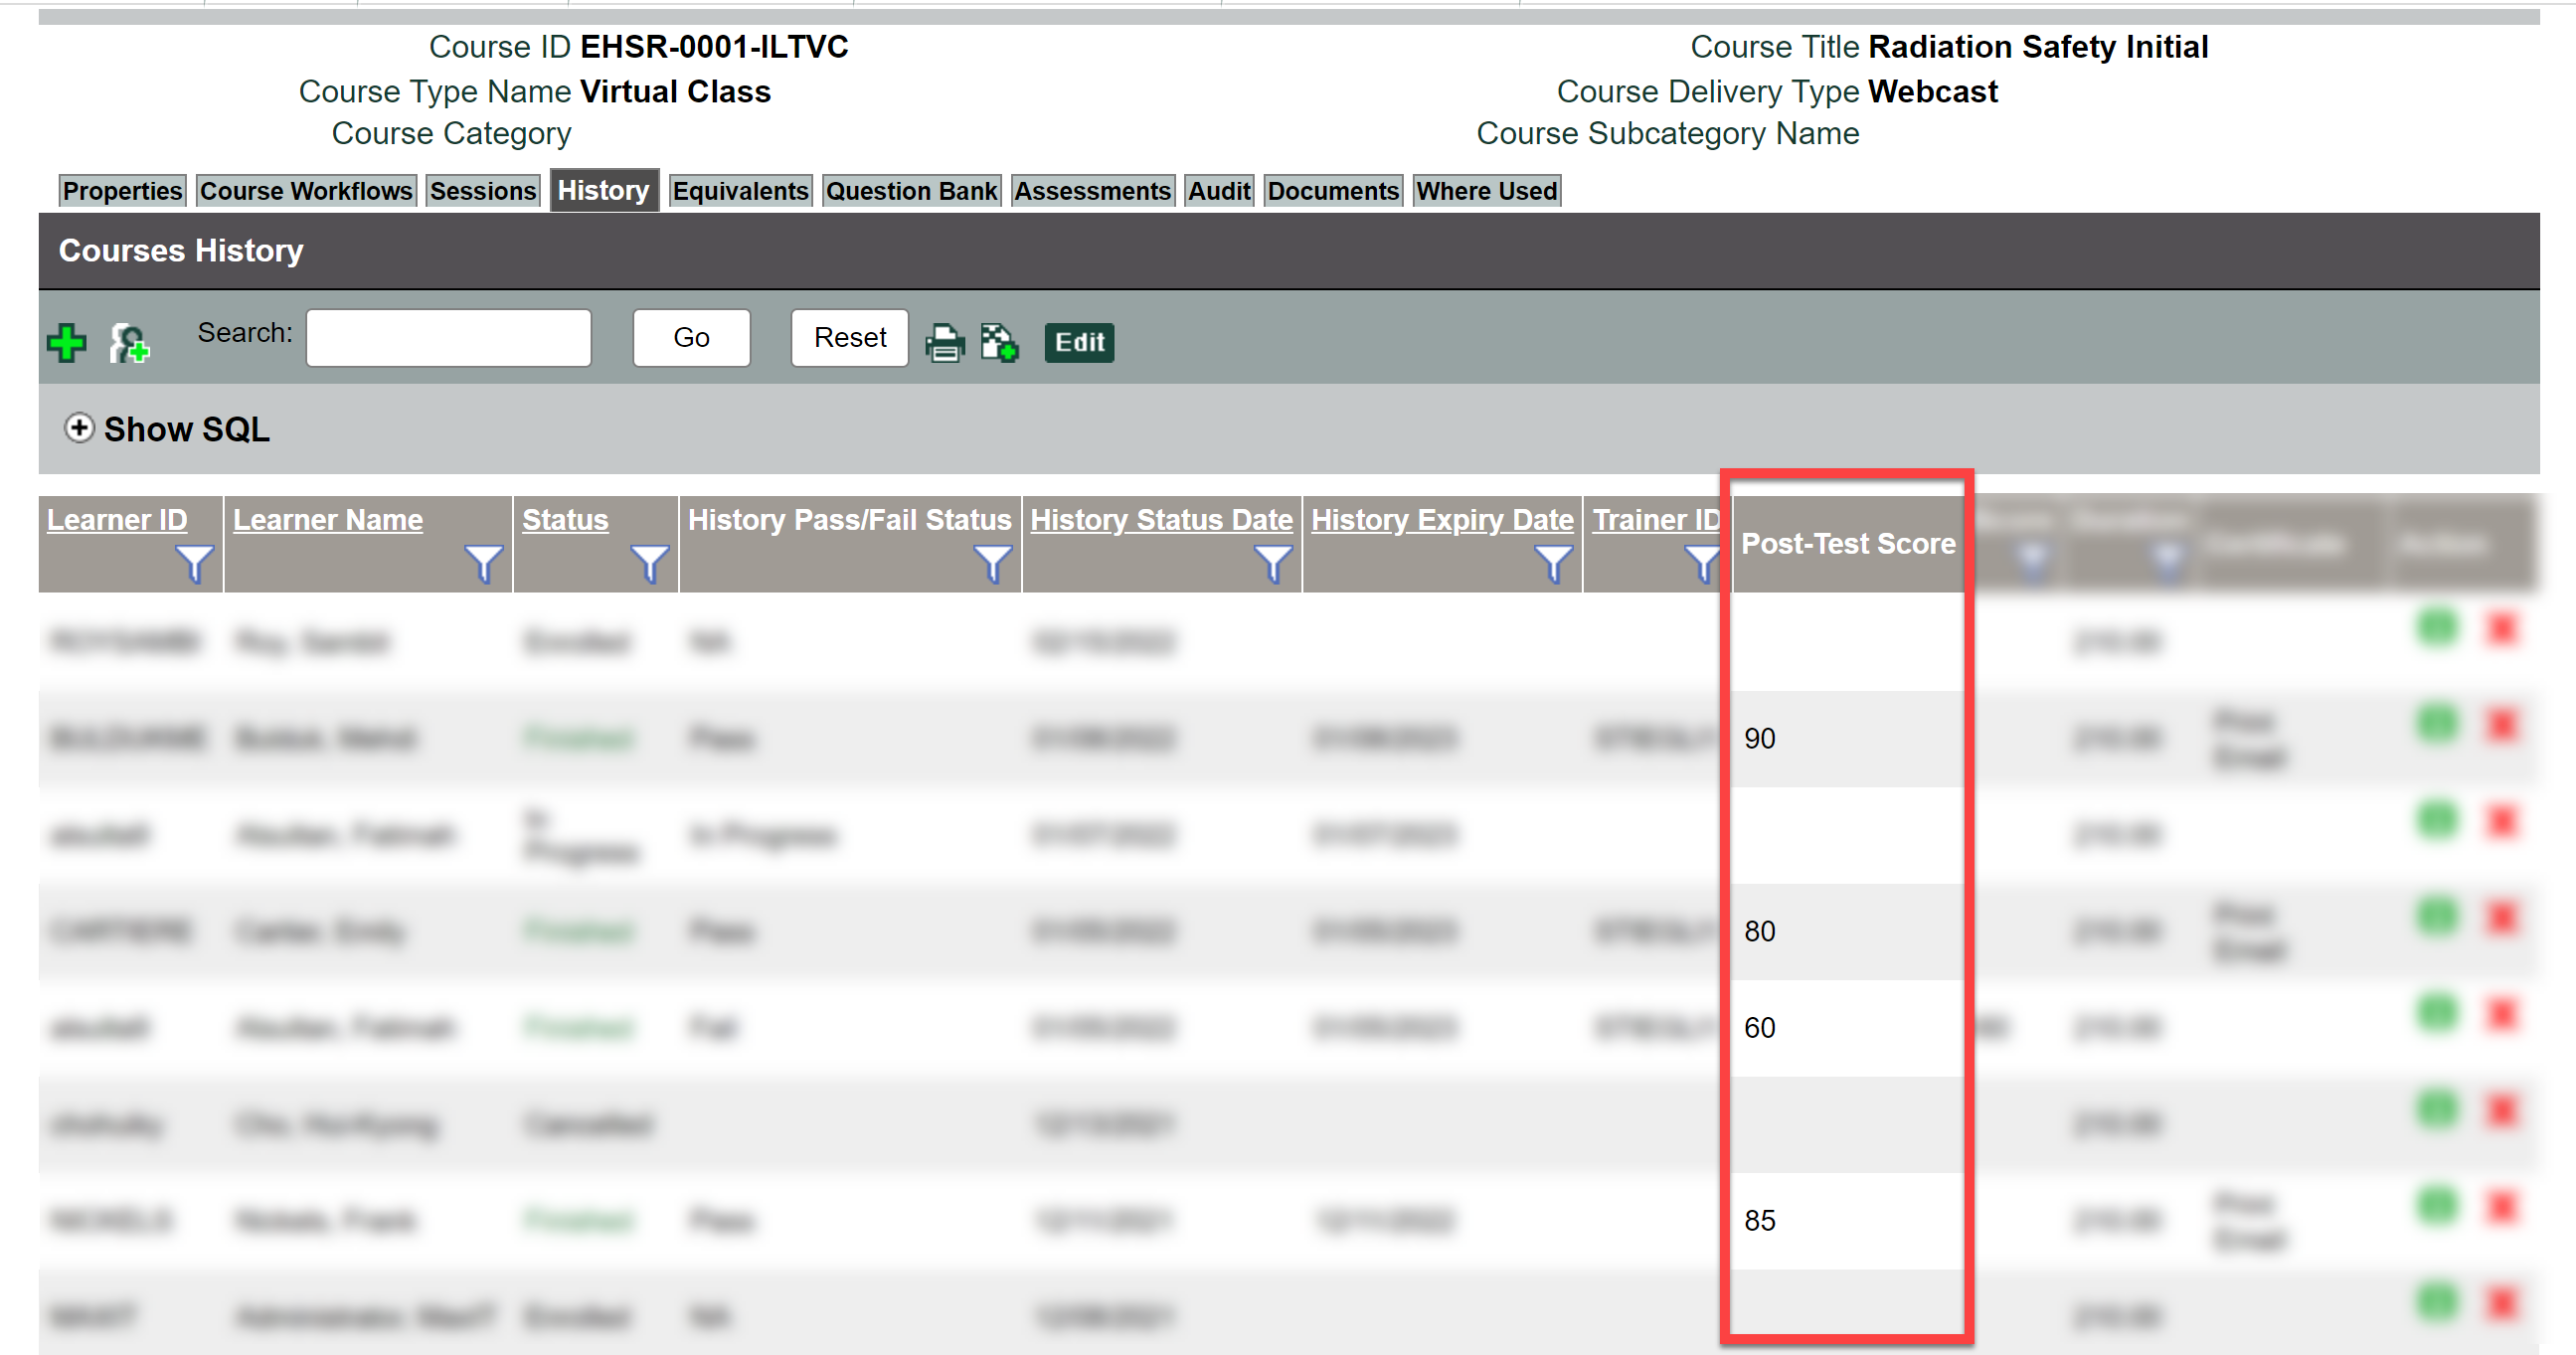
To view scores for Ability assessments, check the Post-Test Score column on the course History tab.
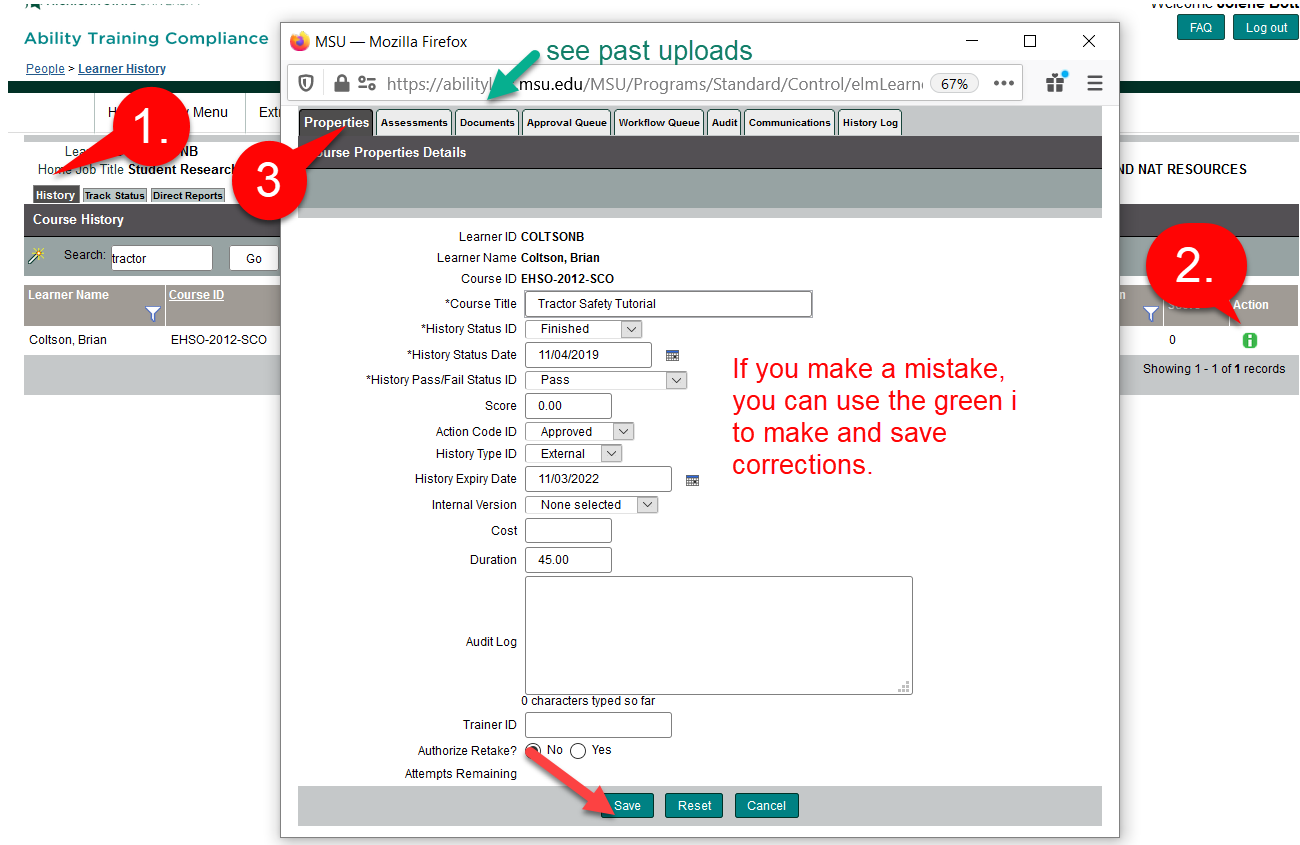
To view score history for an individual learner, click the green i icon, then the Assessments tab.
-
View SCORM Details
SCORM data (details for courses produced using Lectora or Storyline software) is not compiled in Ability, but an individual's course interactions are available. If you are have Trainer or Compliance Admin roles in Ability, you will have access special access to one or more courses.
Your course must be produced to record a test or quiz score in order to get score data.
From the Trainer tile (or Manager Menu), Click Online Courses. The list of courses that you have privileges for are shown. Only edit records as approved.
You can review course history for each student including their total score. However, if you want to view detailed information about how a user answered each question, you must access the SCORM log. -
View Uploaded Documents
Some courses require upload of signature forms, assessment results, or a checklist of topics completed. These files uploaded and associated with an individual learner can be viewed by going to that learner's account (People/Team Member), clicking the learner's name and clicking into the History tab (to the left of the Track tab).
On the right-hand column of the course record, look for the green i-icon. Click that icon to open a pop-up window with several tabs. Records with associated documentation will include a clickable file link. (see video at 45 sec in a new tab)
Edit Training Records
-
Correct a Course Completion Record
If you realize you made an error after you save a history record, you can correct it within the learner's History by clicking the green i icon. In the pop-up, make the correction and save.
